
When old flooring is removed during a demo, it may feel like the hard part is over. But in reality, one of the most important steps is just beginning: cleaning the concrete slab. Without thorough cleaning and preparation, even the best floor coatings can fail prematurely. Dust, adhesives, and hidden contaminants can interfere with adhesion, leaving you with peeling, bubbling, or uneven surfaces.
At CustomCrete, we’ve seen how skipping or rushing this step can compromise an entire project. With nearly two decades of experience preparing floors across commercial and industrial facilities in Chicago and beyond, we know that slab cleaning is the foundation of every successful flooring system.
This guide will walk you through how to clean a concrete slab after demo and why it matters before installing a new coating.

Why Cleaning a Slab After Demo Is Critical
After demo, a slab may look bare, but it is rarely “ready” for a new coating. Flooring adhesives, tile mastic, carpet glue, or paint often leave behind stubborn residues. Dust and fine particles can remain on the surface, even after sweeping. If these materials aren’t fully removed, they can:
- Prevent proper bonding between the concrete and the new coating
- Cause premature coating failures like peeling or bubbling
- Create uneven finishes that affect both appearance and durability
Proper cleaning ensures a smooth, contaminant-free surface, setting the stage for long-lasting results.
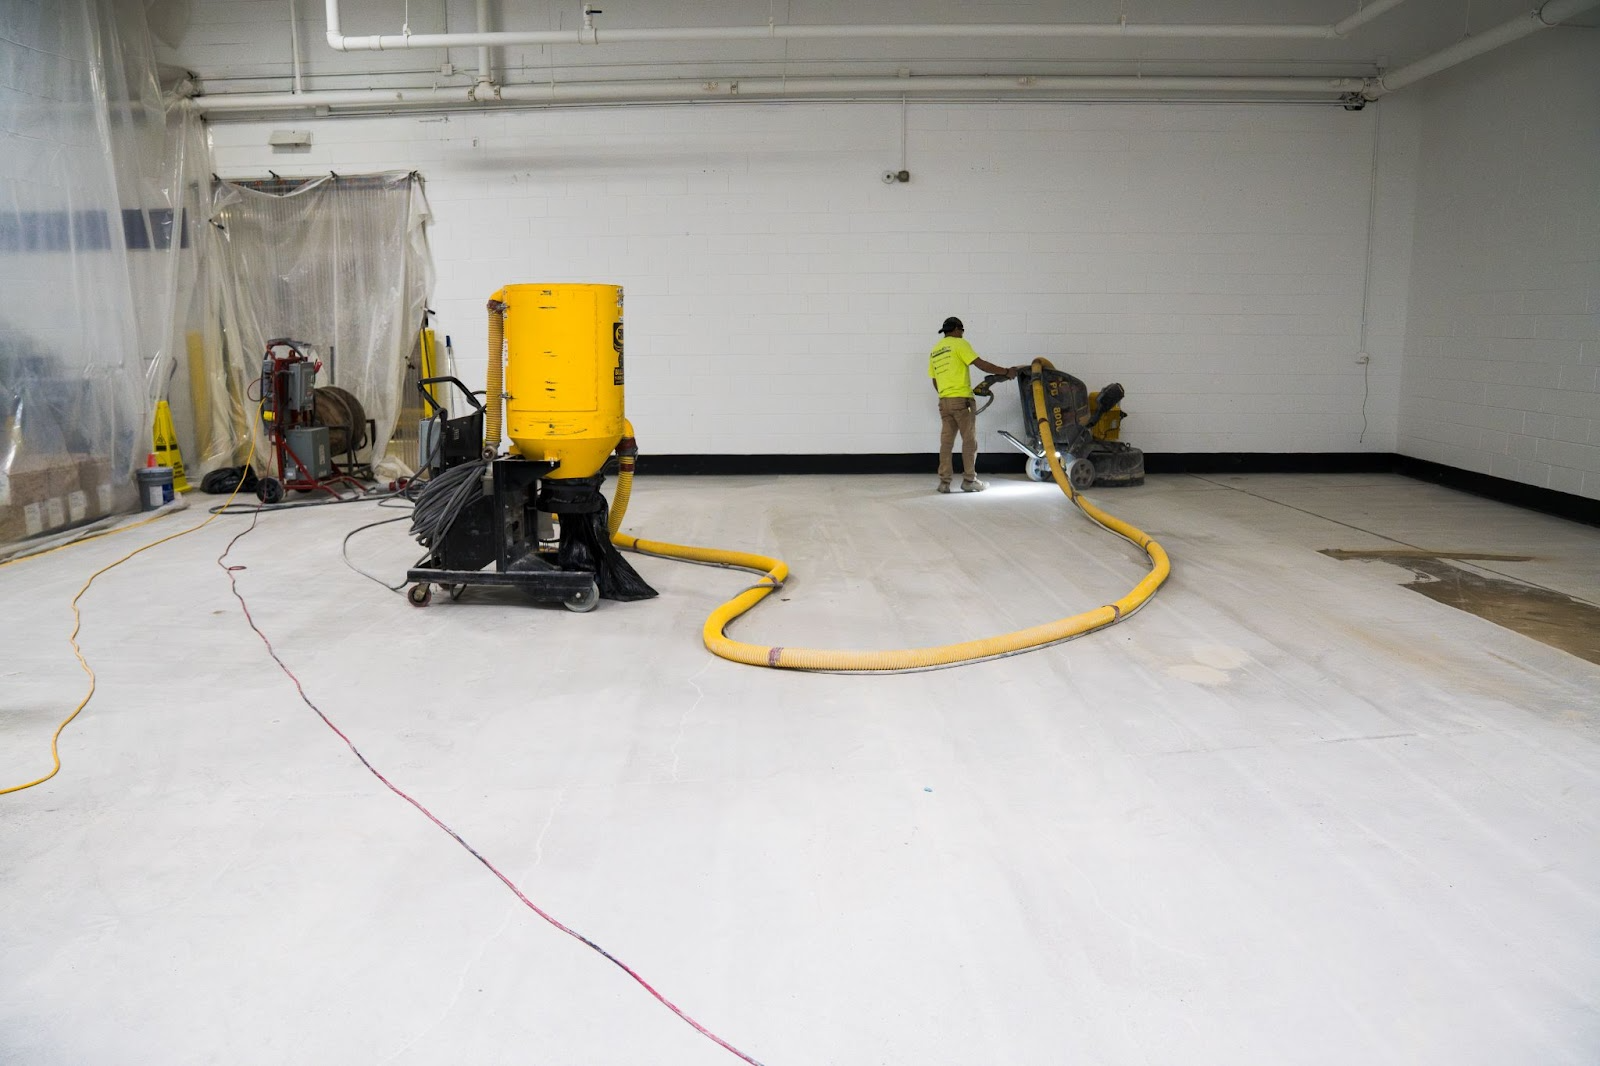
Step 1: Remove Debris and Dust
The first step is clearing the area of leftover demo debris. This includes sweeping up loose materials like broken tile pieces, wood fragments, or carpet backing. After large debris is gone, the slab should be vacuumed with an industrial HEPA-filter vacuum to remove fine dust particles.
Regular shop vacuums often miss microscopic dust that can interfere with coatings. A HEPA system ensures a cleaner, safer surface and helps improve indoor air quality during prep.
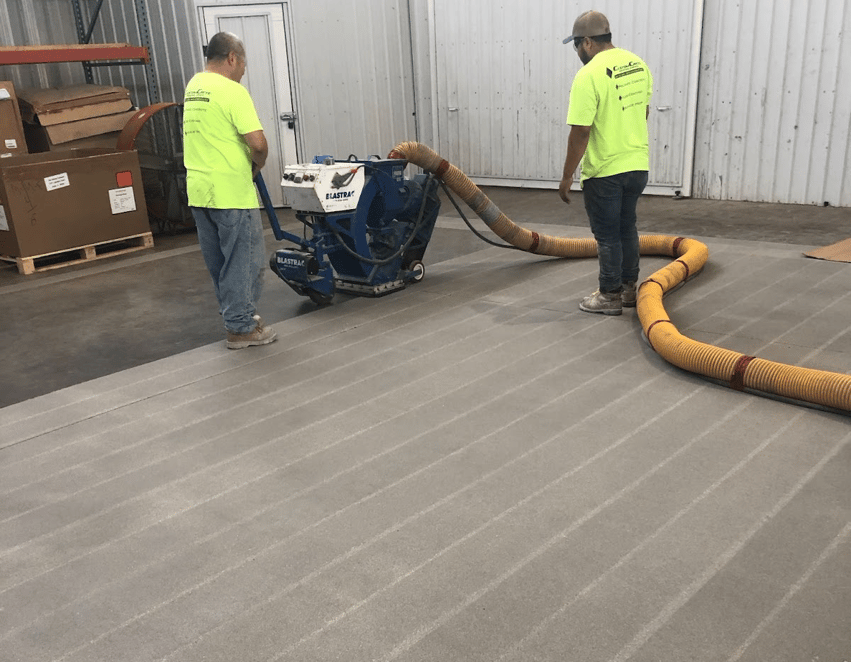
Step 2: Address Adhesive and Residue
Old flooring systems often leave behind adhesive layers, coatings, or paint. These residues must be completely removed before a new system can be applied. Depending on the material, contractors may use:
- Mechanical grinding to scrape and grind off stubborn adhesives
- Shotblasting for removing coatings and opening the surface profile
Chemical removers in rare cases, though these must be followed by thorough neutralization and rinsing
The goal is a bare, clean surface where no glue or residue remains.
Step 3: Degrease and Clean the Surface
In commercial or industrial spaces, oils, grease, or chemical spills may have seeped into the slab. A degreaser is often used to lift contaminants, followed by hot water scrubbing or pressure washing.
This step ensures that any invisible residues—especially petroleum-based materials—don’t compromise adhesion. Without it, coatings may “fish-eye” or pull away from the slab.
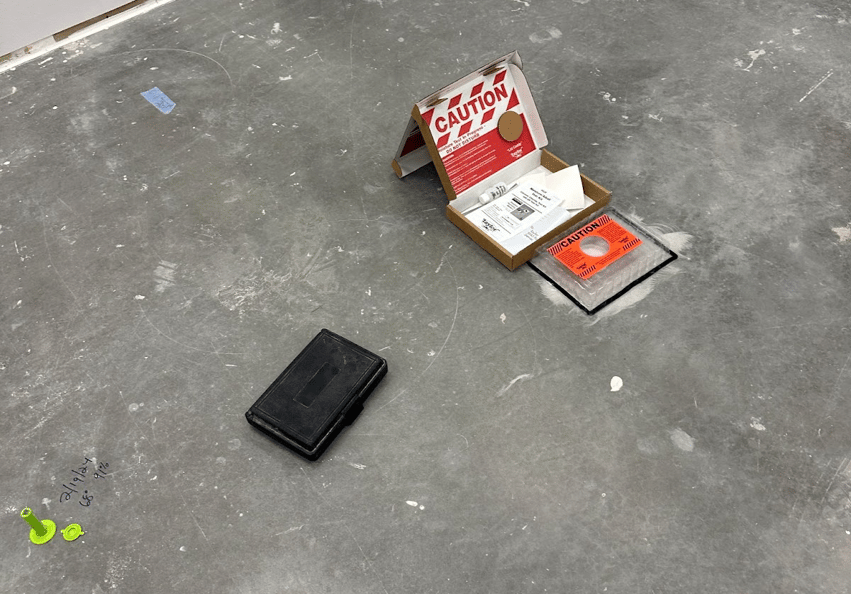
Step 4: Moisture Testing
Even a perfectly clean surface can fail if moisture is present in the slab. That’s why it’s important to perform moisture testing before applying a new coating. Common methods include:
- Calcium chloride testing (measuring vapor emission rate)
- Relative humidity (RH) probes (measuring internal slab moisture)
If moisture levels are too high, additional mitigation steps—like moisture vapor barriers—are needed before coating can proceed.
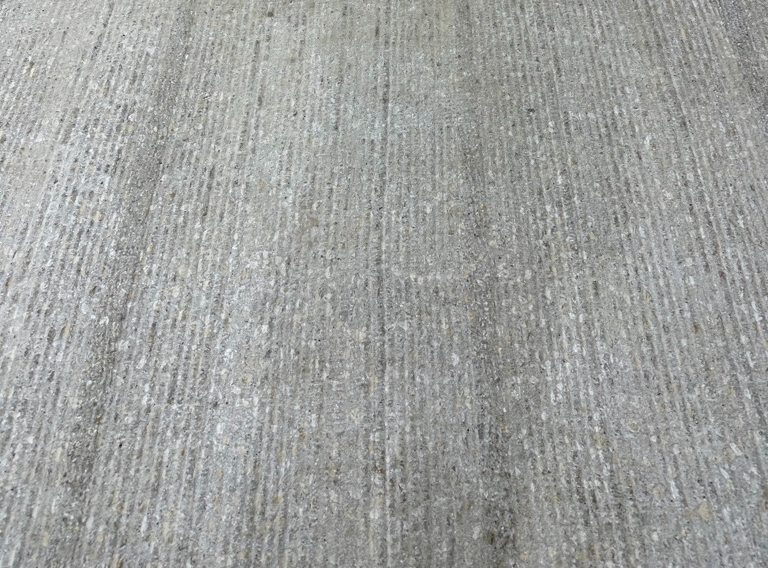
Step 5: Final Surface Profiling
The last step is creating the correct concrete surface profile (CSP) for the coating. Most epoxy, urethane, and other systems require a textured surface for bonding. This is achieved through grinding or shotblasting.
Skipping this step leaves the slab too smooth, increasing the risk of delamination. The right CSP ensures coatings anchor securely to the surface.
Final Thoughts
Learning how to clean a concrete slab after demo is essential for the success of your next flooring project. From removing adhesives to moisture testing and surface profiling, each step plays a role in ensuring your new coating adheres properly and lasts for years.
If you’re planning a flooring upgrade, don’t underestimate the importance of slab cleaning and prep—it’s the difference between a floor that lasts a season and one that lasts decades.
For more information, read our next article, “What’s Involved in Commercial Flooring Demo? A Step-by-Step Breakdown” or visit CustomCrete’s Floor Cleaning page.
Topics:


.jpg?width=6139&height=4093&name=CC100396%20(1).jpg)


