
When planning a new flooring system, what’s underneath matters just as much as what goes on top. Before any coating, polish, or sealing can be applied, the concrete floor must be properly prepped—and that starts with safe and effective removal of whatever was there before.
Whether your old surface is tile, VCT, carpet glue, epoxy, or paint, improper removal can lead to costly delays, damaged slabs, and failed installations. Understanding how floor removal and concrete preparation work can help you avoid these issues and ensure your new floor performs for years to come.
At CustomCrete, we’ve removed hundreds of thousands of square feet of old flooring in active and demanding facilities—from warehouses to office towers to industrial plants. Our team uses dust-controlled methods and strategic scheduling to minimize disruption and ensure the slab is ready for what’s next.

Why Proper Flooring Removal Matters
Removing existing flooring isn’t just about taking up what’s visible. It’s about clearing every layer—adhesives, sealers, coatings, and contaminants—that could interfere with the next floor’s performance.
If the concrete isn’t clean, stable, and textured correctly, you risk:
- Coating delamination or bubbling
- Uneven finishes
- Trapped moisture or chemical residues
- Reduced durability and lifespan of your new flooring
Skipping or rushing through this step is one of the leading causes of coating failure. A clean, well-prepped surface is the foundation of any successful concrete floor installation.
Common Types of Flooring We Remove
Before concrete prep begins, we evaluate the type of existing flooring to choose the best removal method. Some of the most common materials we encounter include:
- Vinyl Composition Tile (VCT): Requires tile scraping and adhesive removal
- Ceramic or Porcelain Tile: Needs chipping hammers and grinding to remove grout
- Old Epoxy or Urethane Coatings: Removed using industrial diamond grinders
- Carpet or Carpet Glue: Tack strips, padding, and glue residues must be stripped and abraded
- Paints or Sealers: Often require multiple grinding passes to fully eliminate
Each of these surfaces demands a specific strategy to ensure the underlying concrete floor is not damaged or contaminated.
How We Remove Flooring Safely and Efficiently
Step 1: On-Site Assessment
We begin with an on-site walkthrough to assess:
- The condition of the current floor
- Type of flooring material and adhesives
- Existing damage or cracks in the slab
- Accessibility and square footage
This helps us determine the right equipment, crew size, and timeline to complete removal without delays.
Step 2: Dust-Controlled Mechanical Removal
Using ride-on floor scrapers, handheld chipping hammers, and diamond grinders, we remove old flooring down to the slab. Dust control is critical, especially in active facilities—so we use HEPA-filtered vacuums and sealed containment systems to reduce airborne debris.
For coating and adhesive removal, we grind the surface mechanically until we reach clean, bare concrete. This leaves behind a slightly roughened texture—ideal for bonding new coatings or sealers.
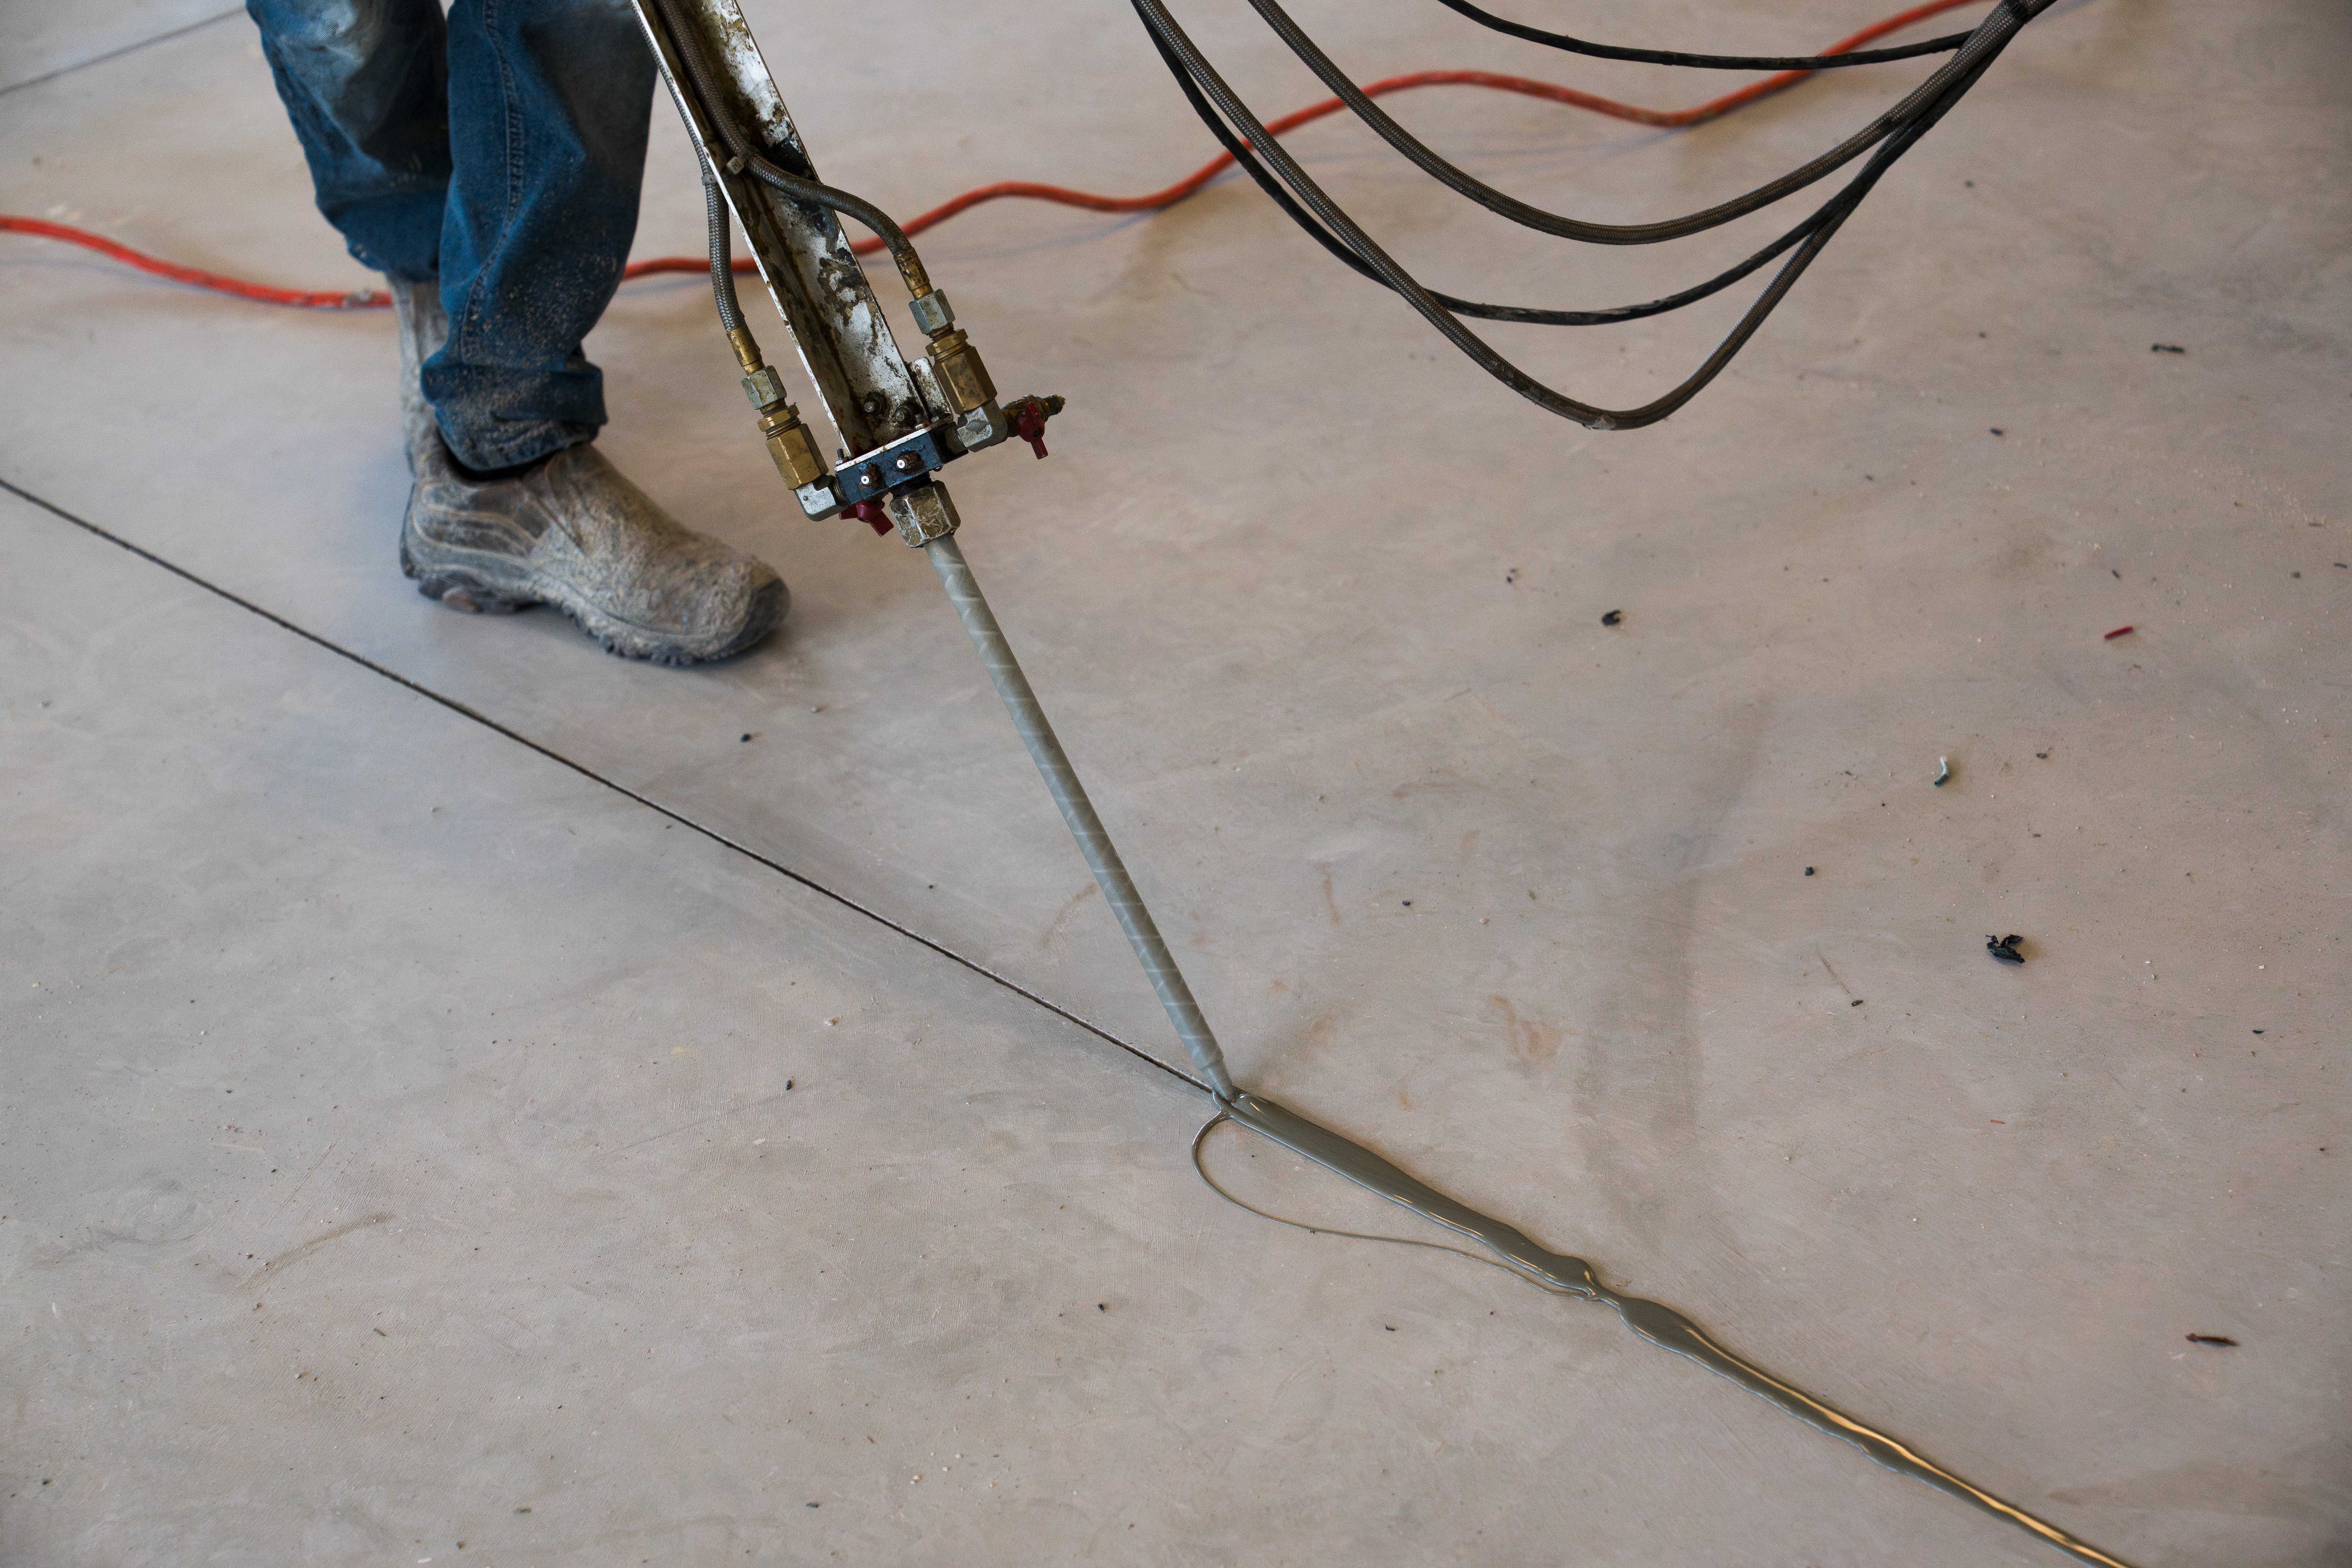
Step 3: Crack and Joint Repair (If Needed)
After removal, we inspect the slab for any structural issues. Cracks, joint damage, or surface imperfections can affect the adhesion of new flooring.
We may use joint filler, patching compounds, or surface repair mortars to restore the slab to optimal condition before moving into final prep.
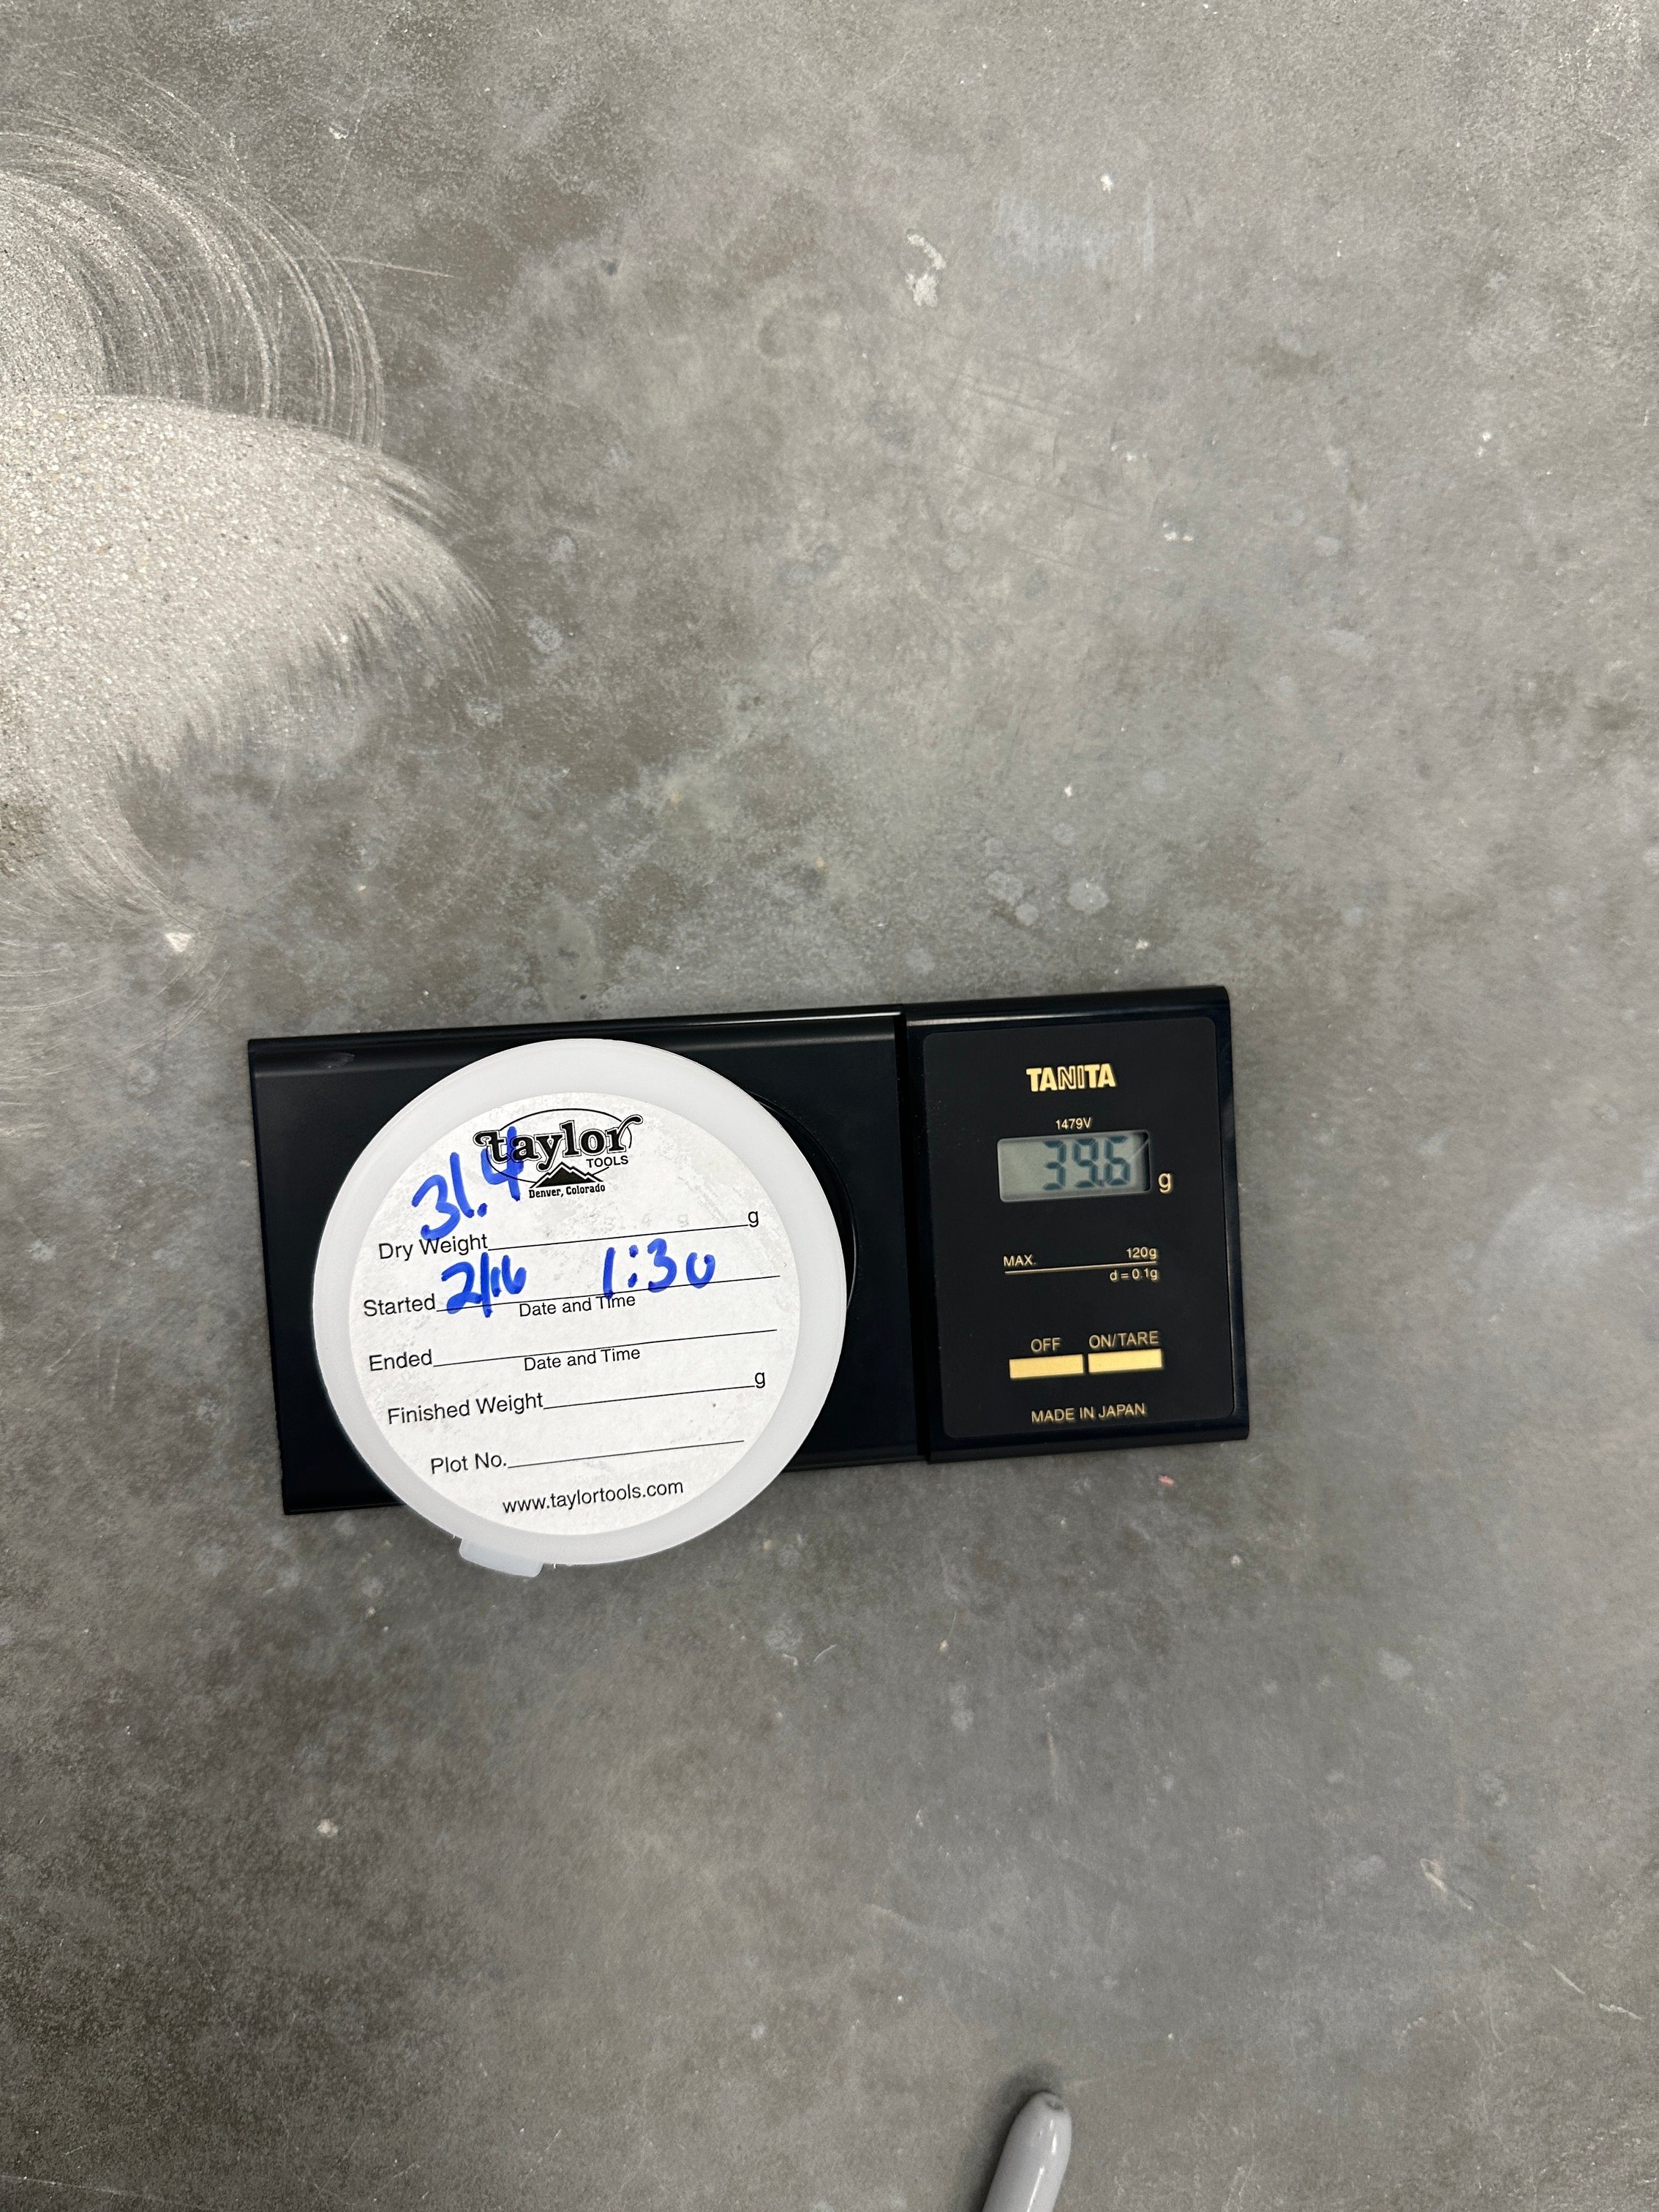
Moisture Testing After Removal
One of the most important—but often overlooked—steps in concrete floor prep is testing for moisture.
After old flooring is removed, trapped vapor can begin to release. If moisture levels are too high, it can lead to coating failures or mold issues later on.
We use ASTM-compliant moisture testing methods, such as:
- Calcium chloride tests
- In-slab relative humidity (RH) probes
- Tarmax testing
Based on the results, we’ll either proceed with installation or recommend a moisture mitigation system if necessary.
Why Professional Removal Matters
While DIY or general contractor floor removal might seem like a cost-saving move, it often leads to long-term issues. Professional flooring contractors:
- Use industry-grade removal equipment
- Minimize damage to the slab
- Understand how different materials behave during removal
- Plan with coating adhesion and durability in mind
- Follow proper environmental safety protocols, especially for dust and debris
At CustomCrete, we coordinate removal and prep with your new flooring system from day one—avoiding rework, project delays, and unnecessary costs.
What to Expect During the Process
Timelines vary based on square footage and material type, but most removal projects for commercial spaces are completed within 1–3 working days.
Final Thoughts
Removing your existing flooring the right way is the first step toward a successful concrete floor system. By investing in professional removal and prep, you set your project up for long-term durability, aesthetics, and safety—whether you're installing epoxy, polished concrete, or any other surface.
CustomCrete has the tools, experience, and attention to detail to handle floor removal and prep with minimal disruption to your operations. We don’t just make old floors disappear—we create the perfect foundation for what comes next.
Ready to learn what goes into the cost of concrete prep? Check our article: How Much Does It Cost to Prep Concrete? to understand the factors that impact pricing and how to plan your project budget wisely.
Topics:

.jpg?width=6139&height=4093&name=CC100396%20(1).jpg)


.jpg?width=1200&height=1600&name=Copy%20of%20IMG_1457%20(1).jpg)


